Big Snafu

My Adventures in Awkwardness

Rudimentary Knitting Sheath Update

100_0449

Capped needle stuck through plastic cap and plastic cap stuck in knitting sheath.

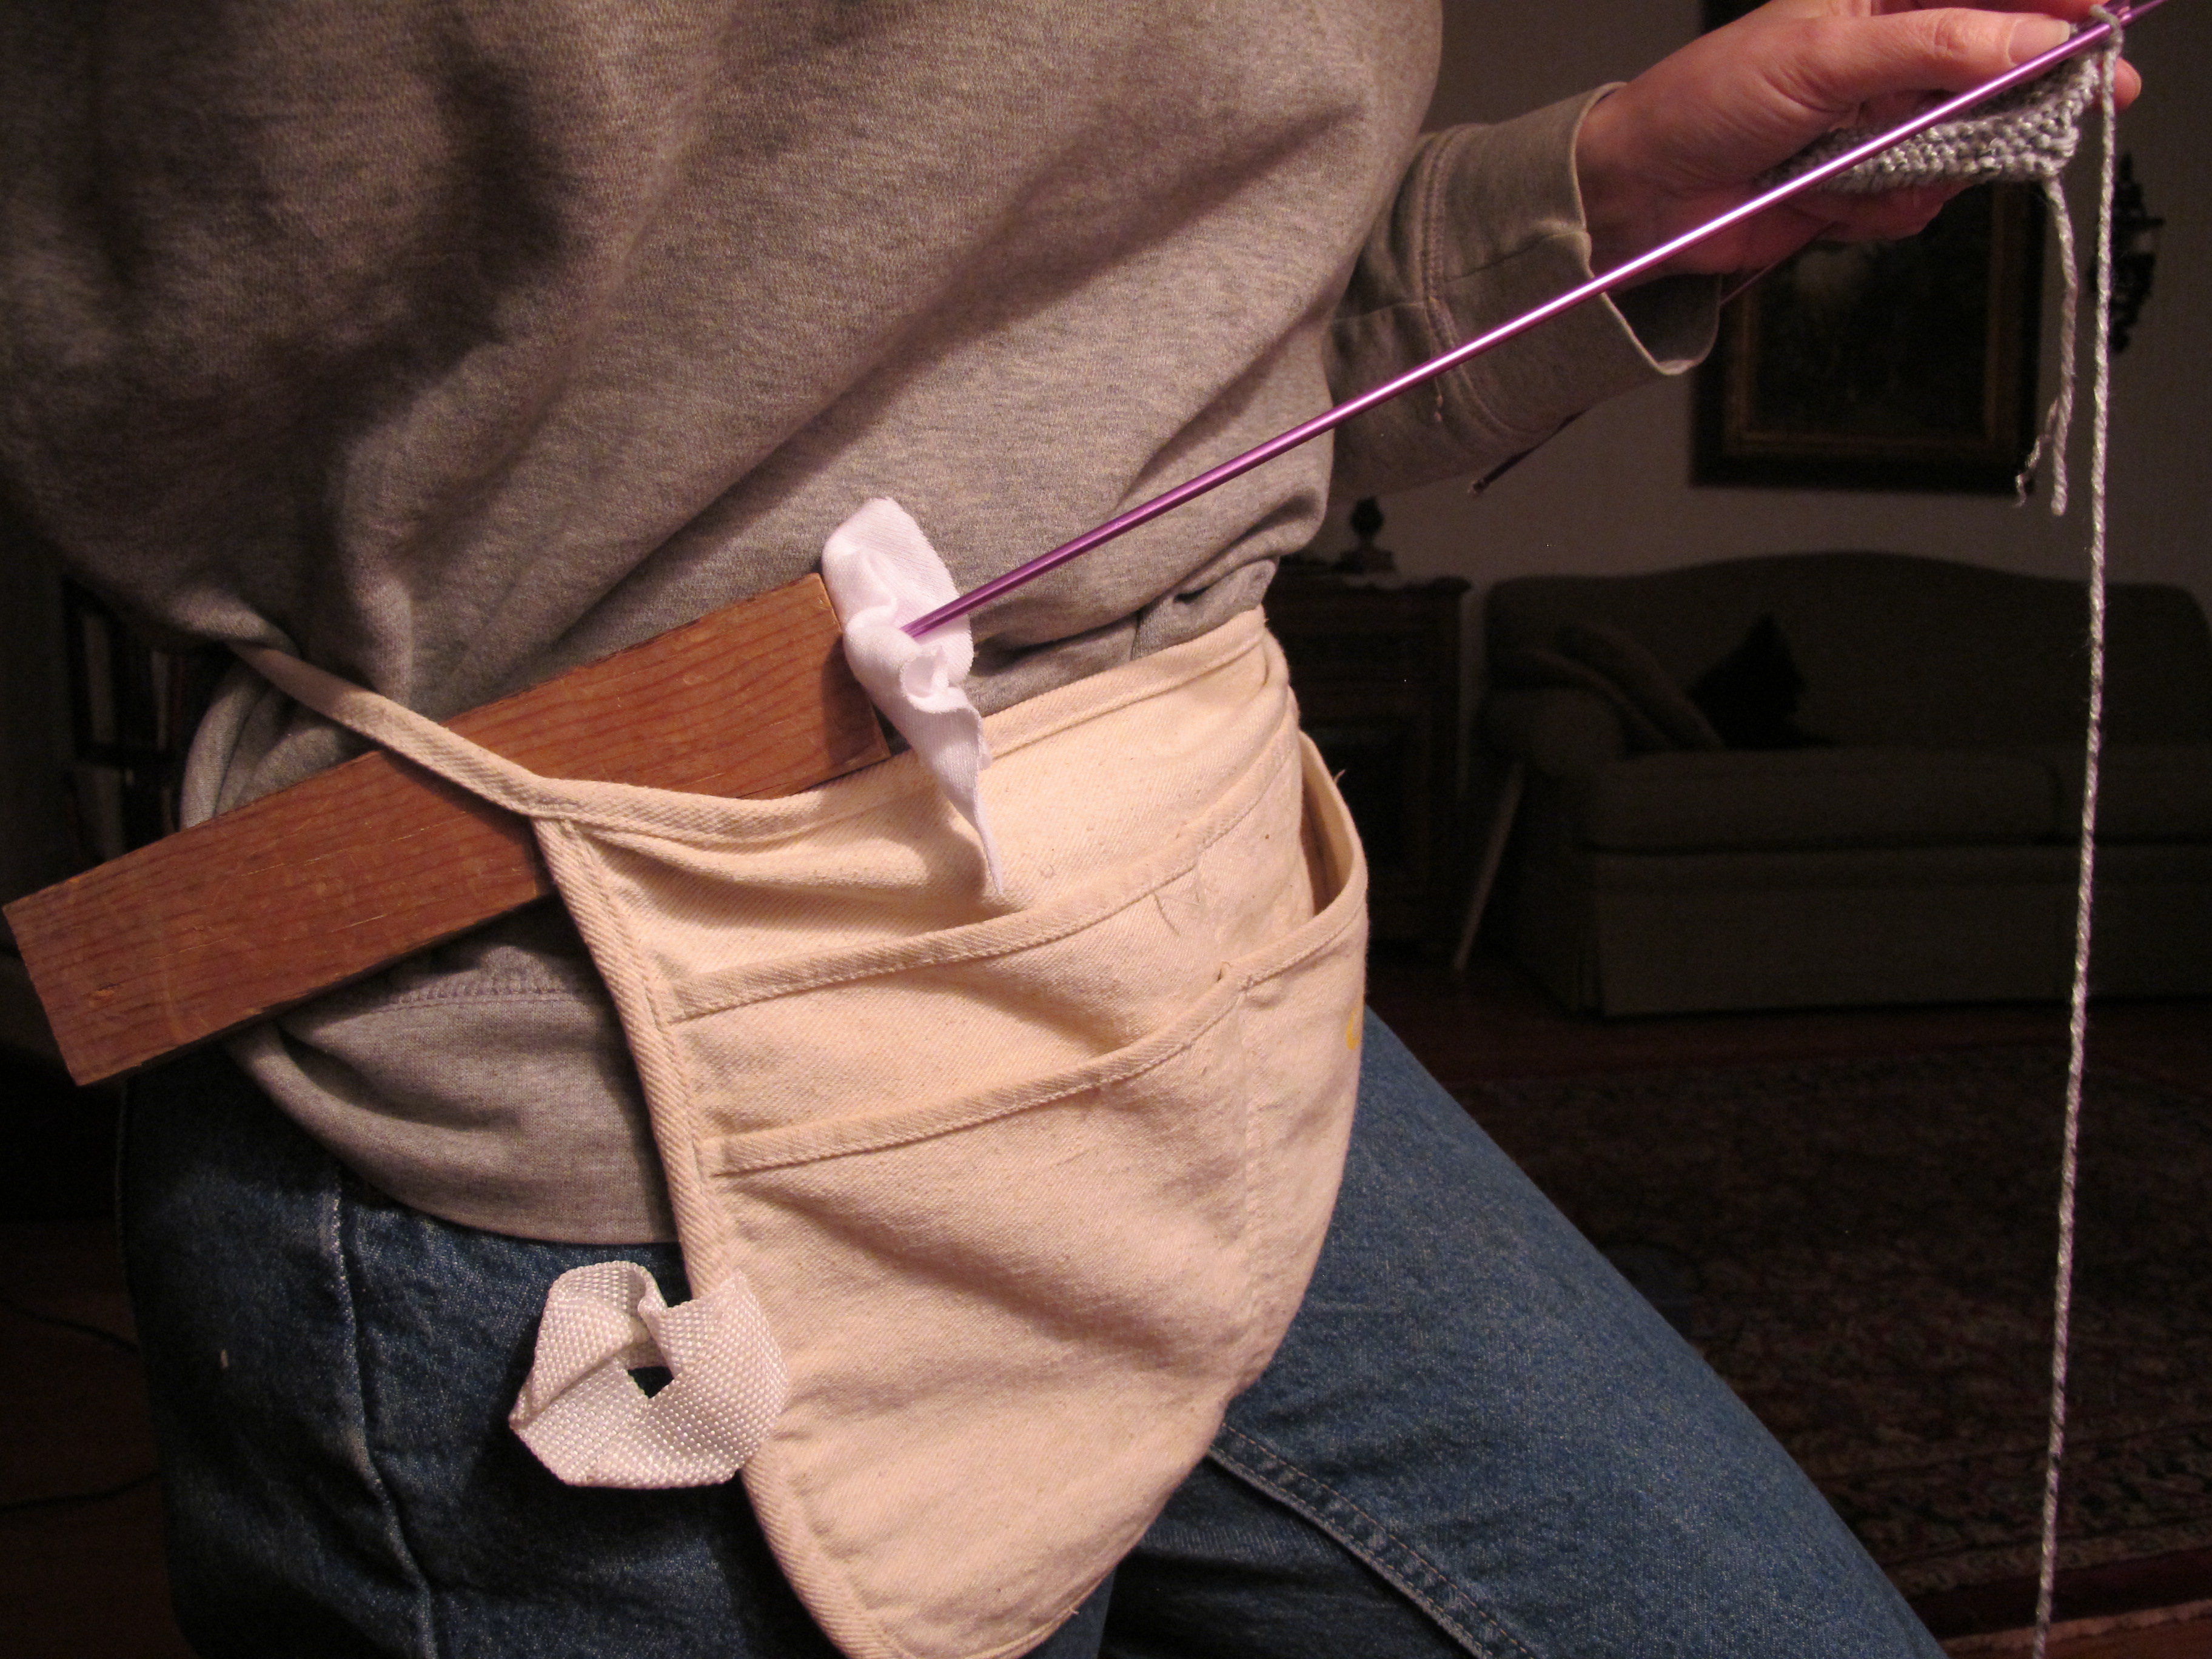
My original post describing a rudimentary knitting sheath must have gotten picked up by search engines, because it has recently become my most-read post and attracted readers from several different countries. (Hello, Canada, Australia, and U.K.!) After writing the first post, I got frustrated by wobble in the sheath-needle and tried to come up with a snugger fit to eliminate any motion.

The most obvious solution was to use needles without caps so that the part of the needle inserted into the sheath was the same diameter all the way down. This made the hole snug around the entire portion of the needle inserted into the block of wood. One can buy needles without caps, but I took a pair and cut the caps off with bolt cutters. This worked fine. When the needle is not in the sheath, I put a stitch counter on the end where the cap used to be to prevent the work from sliding off when I set it down.

100_0448

On left, plastic cap with hole. On right, batting wrapped with duct tape.

I didn’t want to cut the caps off of all my needles, though, and I sure didn’t want to replace them all with capless needles. The needle needs to be inserted about half an inch into the sheath to hold it steady. So I needed to figure out how to fill in the space in a more stable way than stuffing batting in the hole. One way was to wrap the end of the needle tightly with batting then hold it in place with duct tape. Surprisingly, when the wrapping is tight, this holds the needle firmly. I haven’t used it much so I’m not sure how long the batting will hold up, but it is cheap and easy.

The second way was to take a plastic cap that fits into the hole and poke a hole in the center. I used the knitting needle I would be using the cap with to poke the hole, so the hole was the perfect size. This method holds the needle very firmly – there is no motion at all. The caps I used came off of the ends of an old café style curtain rod.

I find that I knit quicker with less wobble in the needle stuck in the sheath. I opted for low tech, inexpensive solutions to the wobble. Other possibilities I thought of but didn’t try were wooden beads and a stack of small washers. Because there seems to be a fair amount of interest in making one’s own sheath, I wanted to share this update.

Happy knitting!

Rudimentary Knitting Sheath

IMG_0263

A rudimentary knitting sheath allows one-handed knitting leaving the other hand free to take terrible pictures.

***07/21/13: I updated this post here.***

One of the things I’ve been thinking about lately is downsizing my possessions.  I have many things I never use, for instance, a yarn stash and knitting books from back when I used to knit.  Shoulder surgery reduced my moderate knitting speed to a crawl.  It’s not that I can’t knit anymore – it’s that I have trouble maintaining interest when it takes me so long to complete a project.  I decided I had to make my peace with knitting by either increasing my speed or giving away my yarn stash and books.  I began by looking for a way to increase my speed and discovered lever knitting.

In lever knitting, the right needle is held in a fixed position and only the left needle is moved instead of the standard moving two needles approach.  The idea is to make the knitting more machine-like and therefore quicker.  Keeping a needle in a fixed position is accomplished several different ways.  Some knitters use long, straight needles and hold one end under their arm.  Shetland knitters use a knitting pouch and capless needles which are put in the holes of the pouch.  In pre-industrial England, knitters used knitting sheaths.  Knitting sheaths were wooden and had a hole to put the end of the needle in.  They were stuck through a belt or apron to fix them at the knitter’s side.  Knitting sheaths allowed one-handed knitting.

If you do an Internet search you will find many beautiful examples of knitting sheaths.  Young men often carved them as a gift for their betrothed.  I wanted to try a knitting sheath but wished to make one as simply as possible.  I realized all it required was a hole in a block of wood, so I drilled a hole in a piece of scrap wood.  Not handsome like the carved examples I found but functional!  I’m posting this picture of my plain sheath to demonstrate that even if your sweetie does not have the carving skills of a pre-industrial male, he can still make you a knitting sheath.  Or, if he can’t operate a drill, perhaps you can make it yourself.  I tried to drill a hole the size of the needle’s cap, but the drill bit was slightly larger so I stick a piece of fabric in the hole so the needle will be held firmly.

IMG_0260

After knitting just a couple of rows, I was able to increase the speed of my knit stitch by 54% and the speed of my purl stitch by 33%.  Presumably as I practice, my speed will increase even more.  A fast knitter might not increase her speed by as much as I did but might find trying the sheath worthwhile given the minimal investment.  Another benefit of lever knitting is that the reduced motion saves wear and tear on a knitter’s shoulders.

Have I made my peace with knitting?  I’m not sure!  I’ll have to see if I knit often enough and quickly enough to finish any projects.  Fair warning, Stash: you’re not safe yet!

Post Navigation